As any of my readers would know, I am not a faithful
blogger! I always have good intentions of writing more but don’t do it. So…I am
going to try something new! I will save my blog in case I start writing again
or if we go on a trip that I want to blog but otherwise I am going to use
Facebook. I have started a Close To MyHeart with Laurie Facebook page that I would love for you to check out and
Like. I will be posting links to videos, scrapbook, card and project ideas,
highlighting specials and great deals and advertising any classes or retreats
that I offer in the future. Come check
it out and if you have any feedback or suggestions I would love to hear it!
Showing posts with label CTMH. Show all posts
Showing posts with label CTMH. Show all posts
Friday, November 8, 2013


Tuesday, December 4, 2012
Three New Tools!
Close To My Heart introduced three new tools this fall that I am excited about! I don't have them yet but they are now on my wishlist. Check out this short video to learn how to use the quilling tool, rub-on tool and chalk marker! If you have a Cricut and want a super easy way to make the rolled 3-D flowers then you need to watch this video!
Thursday, November 29, 2012
Christmas cards


Same layout - two different looks! I chose a layout from "Make It From Your Heart Vol. 1" and used CTMH's new Pear and Partridge paper. I love the sparkle from the self-adhesive Silver Shimmer Trim! The stamp set on the top card is C1510 Merry and Bright - I stamped it in Olive and then a second time in Cranberry. I cut out the flowers and ribbon and adhered to the Olive wreath. I added a pearl to the ribbon. To make the bird I inked my stamp with sponge daubers using Cranberry pigment ink and in Cashmere pigment ink and then stamped. I added cocoa marker for the eye, beak and legs and cut it out.
For the second card I used D1483 Glory to God - my favourite Christmas stamp! I simply stamped the manager scene in black, the star image in yellow and added sparkles.
Let me know what you think!
Thursday, October 4, 2012
New Organizing Tools
If you are like me and have wondered about CTMH's new organizing tools - what size they were, how much they would hold and so on, or if you need to organize your crafting supplies, then check out this short 1:49 video!
I love that the new craft boxes are larger so I can organize more than just brads or eyelets! When my supplies are organized scrapbooking and crafting are even more enjoyable.
I love that the new craft boxes are larger so I can organize more than just brads or eyelets! When my supplies are organized scrapbooking and crafting are even more enjoyable.
Thursday, September 27, 2012
Digital scrapbooking even faster!
Close To My Heart has introduced Express Collections that make digital scrapbooking with Studio J even faster! Express Collections are groups of layouts that are designed for you. Examples include "A Year in Review", "Travel", "School Days," Little Miss", "Little Man" and more.
I have been loving these new layouts - I used the Travel collection and within a couple of hours scrapbooked 8 layouts from two of our cross-country trips! I can't do that with classic scrapbooking. Drop in the pictures, edit the titles, add journaling and I was done.
Check out this video to see how Express Collections work:
Thursday, September 13, 2012
Inspiration from CTMH
Close To My Heart has come out with quite a few new videos showcasing their latest and greatest new products! Here's two of my favourites:
First, learn about our fantastic new alcohol based markers while making a harvest banner:
and second, discover a super simple new stamping technique to add interest and dimension to your stamping!
First, learn about our fantastic new alcohol based markers while making a harvest banner:
and second, discover a super simple new stamping technique to add interest and dimension to your stamping!
Monday, August 13, 2012
CTMH Holiday Ornaments Video
I love this stamp set and coordinating Dimensional Elements (chipboard) - they are on my wishlist for my next order so I can make my own ornaments for our Christmas tree and for gifts! This would be a fun project to make with my kids (at least the youngest two :) - they would love stamping them and adding glitter and embellishments.
Thursday, August 9, 2012
CTMH Stamping Inspiration Video
The new Autumn/Winter Idea Book is here and with it some great new kits and stamps! Drop me a line if you would like to receive a hard copy of the Catalogue and Idea Book. Check out this 2 minute video to see some great artwork using some new Workshop on the Go stamp sets.
Saturday, July 14, 2012
Cards – Birthday cards
I made these cards for a card workshop
I taught the last week of April – in between packing and cleaning!
I used a CTMH layout and Lucy paper. I wanted to teach ink
distressing and focus on stamping. We stamped the title and the
images – either flowers or the cupcake and ice cream cone and then
coloured them in with ink and the watercolor brush or blending pen.
I also wanted to show how you can make a feminine card or masculine card with the same pieces of patterned paper – just my using the
reverse side of the double-sided cardstock-weight patterned paper!


Stamp set "Card Word Puzzle" coloured in with blush ink and a waterbrush

On this card I used the Lucy glittery rub-ons to show how they work and that you could use them to make a card with little or no stamping.

Stamp set: "Look Who's..." coloured in with blending pen and ink
We embellished with pearls, sparkles,
clear or bling buttons! I love to see the beautiful cards people in
my classes create with the same supplies. I wish I could show
you all the variations. Next time I'll take try to remember to take my camera with me
and then post pictures of everyone else's creations!
Saturday, July 7, 2012
Scrapbook layout – Sweet Little One and Computer Journaling Tip
Another layout about Jeremy's
determination and mechanical interests! I used retired Zippidee paper
from CTMH (still available through Studio J though!), rub-ons from Making Memories, and chipboard stars from a variety of companies. I stamped the stitching lines around the
journaling block and the strips of patterned paper with a retired stamp set “All
Stitched Up.”

Do you like computer journaling but
hate using a new piece of 8 1/2 x 11 piece of paper every time you
do?
Here are my steps to my favourite way
to add computer journaling to my layouts:
1)Cut the journaling piece the size you
want
2) Make a text box in your word
processing program the same size as your journaling piece
3) Type your journaling and size to fit
the box
4) Print out your journaling on
computer paper or scrap paper
5) Adhere your journaling piece on top
of the box on the computer paper with removable adhesive
6) Put your paper back into the printer
so it will print right on top of your journaling piece
7) Remove the lines on your text box in
your word processing program
8) Print again
Voila! You have your jouraling right on
your journaling piece without having to cut up an entire piece of 8
1/2 x 11 piece of cardstock!
Friday, May 4, 2012
Scrapbook layout – First Steps
It was fun to remember when Jeremy was
first learning to walk. Although, he didn't really want to walk –
he wanted to run! Right from the beginning he has been an intense boy
who wants to do more than he is capable of and keep up with Nathan and
Noelle.

I used Typeset paper and the coordinating
canvas stickease. I was even able to write my journaling on the
canvas journaling sticker with a black pen.
I love the look and feel of CTMH's new
canvas stickers – it is easy to see the texture yet they add very
little bulk to my pages – a new goal of mine as I am trying to put
one whole year of layouts into one album. After three albums for 2008
I decided I needed to take action or we'd be swimming in scrapbooks
by the time the kids graduated! Digital pages, less bulky pages and
trying to not scrapbook all the events of the year have been my
strategies to have fewer albums.
All supplies are Close To My Heart
other than the “First steps” rub-on title and footprints.
Tuesday, April 17, 2012
Dotty for You CTMH special!
The latest CTMH special is super fun dotty patterned paper! The special runs from April 17-May 31 so check out the picture below or watch the video to see artwork created with the 24 sheets of two sided patterned paper that you can buy for only $5 (with a $35 order) or receive FREE. To take advantage of this offer, go to my online store or email me today!


Monday, April 9, 2012
Wednesday, April 4, 2012
Scrapbook layout - Christmas 2009 digital layouts

I loved the pre-set stitched circles on this layout and then I had fun adding brads onto the scallop border and layering stickers. Done!

This layout came together quickly since after I added the pictures all I needed to do was play with the title and journaling space.

I love being able to add titles on top of embellishments like ribbon! A simple layout that took little time with the pre-set layout and embellishments. I did change the title box and journaling box to picture wells so I could include more pictures.

I had fun adding the stitched stars and then filling one of them with buttons! The stocking banner was made with the stitched pennant banner, covering the pennants with green journaling blocks and placing the stocking stickease over top. A little finicky but I love how it turned out.
Check out Studio J if you are interested in easily creating digital layouts like these! There is no cost to use Studio J - you only pay when you order your layouts!
Monday, March 26, 2012
Scrapbook pages - Enduring
Another series of Sears photo (and one school photo) pages - this time from 2010! While I was on a roll, I grabbed my new Florentine paper pack and coordinating stickease and created these four pages. I used a few of different stamp sets on the second layout - Love Life, Childhood Portrait and a retired stamp State of Mind. The only other embellishments are small paper flowers and cocoa brads.


Monday, March 19, 2012
Scrapbook pages - It doesn't get better than this
I created these two layouts with my children's Sears pictures from 2009. I always enjoy scrapbooking their Sears pictures because there is no story to go with them so I have fun just making them pretty! (I do love the story telling on most pages but these pages are a nice change for me).


I used the new Stella paper and Stella canvas stickers from CTMH. I'm enjoying having patterned strips on the top of each 12x12 paper to use as extra borders. The words on the first page are also from one of the top strips. The scripture quotes and clear quotes are from my general stash. The layout ideas are from Imagine and the Lucy Workshop on the Go.
I love to hear feedback if you have any comments!
Tuesday, February 28, 2012
Card class with new stamps!
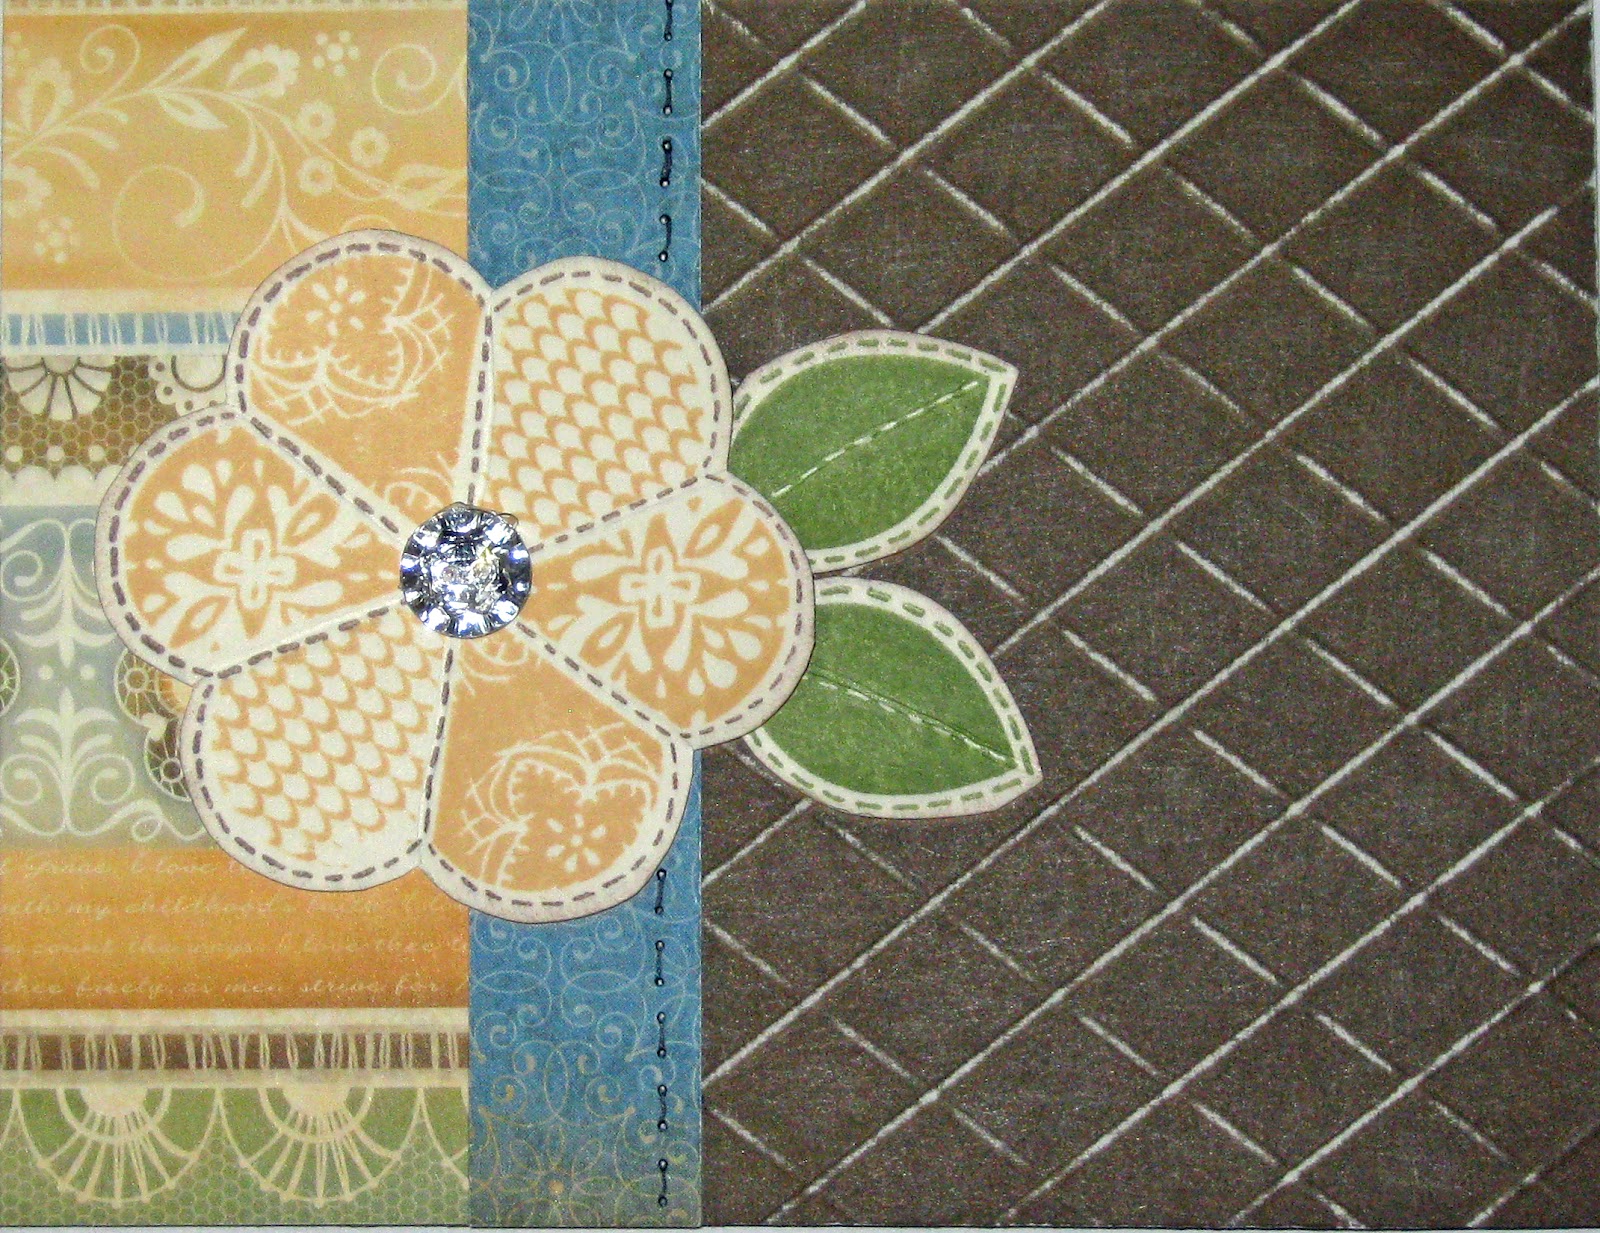
I taught a card class a couple weeks ago and these are the cards we made:

 I used Close To My Heart's new Florentine paper, and the stamp sets "Just For You" and "Card Word Puzzle." I created scored lines on cocoa cardstock with a dry embossing stylus or bone folder at 1/2 inch spacing (either vertical or diagonal) and then sandpapered the raised side. I then adhered the patterned paper and used CTMH's ruler with guide holes to create the faux stitching. Lastly, I stamped the flowers, cut them out and added embellishements (brads or bling buttons). I used the embossing tool again to score the lines on the flowers and leaves to help bend them and add dimensions. I think everyone enjoyed learning new techniques and I enjoyed seeing the creative ways that people adapted my design.

Saturday, January 21, 2012
Picture Memory Game
Here are pictures of the memory game I made for my niece Kaytrianna for Christmas. (I also made two more boxes for nieces and nephews on Daniel's side of the family). Kaytrianna is only two but I've been told she loves to play the game and say our names as she matches up our pictures! I thought it would be a great way for the little members of our families to remember what we looked like while we live in Toronto!
I used CTMH's Memory Game which comes with 24 - 3x3 chipboard cards in a sturdy box with a magnetic closure. I inked the edges, used Mod Podge to glue on the paper, stamped titles and a cut-out heart! I ordered the pictures already pre-sized from Scrapboookpictures.com* which was a great time-saver and let me zoom in and print only what I wanted.


I used CTMH's Memory Game which comes with 24 - 3x3 chipboard cards in a sturdy box with a magnetic closure. I inked the edges, used Mod Podge to glue on the paper, stamped titles and a cut-out heart! I ordered the pictures already pre-sized from Scrapboookpictures.com* which was a great time-saver and let me zoom in and print only what I wanted.


*Unfortunately, I just found out that Scrapbookpictures.com has gone out of business as of January 3! They said that due to a struggling economy and tight competition they can't continue. For anyone that has ordered through them before, it is a big disappointment. I don't know of another company that offers the many different size options, the high quality and the customer service that they offered. I will really, really miss their business.
Saturday, January 14, 2012
Birthday Wishes layout
These pictures are from Jeremy's 1st birthday and I had so many pictures that I wanted to include that I used a 8 x 12 flip flap to fit them all in! All supplies are CTMH and while the paper is retired you can always make layouts with it on Studio J!


Subscribe to:
Posts (Atom)